Note: This post uses affiliate links at no additional cost to you! By clicking the links in this post, I earn a small commission should you make a purchase. Thank you in advance!
Greetings! Let’s have some fun with products from Pear Blossom Press today!
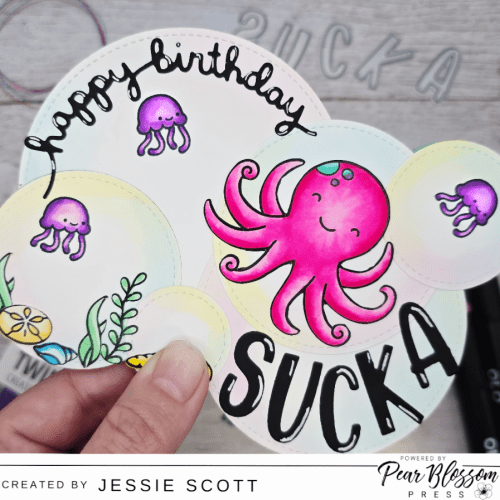
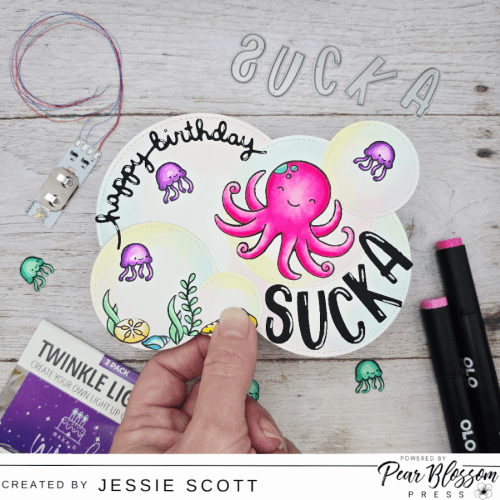
Here’s what we are making in action!
Scroll to the bottom for coloring and assembly video links on youtube or you can read my quick summary below!
I made a custom shape card for the card base for this card. You can make a shape card easily using your paper cutter’s editing program or, I use the free program Inkscape to make SVGs for my Brother Scan N Cut to import.
Here’s a quick video tutorial if you want to give it a try! You can also just assemble the circles onto a card base, trace the outline and cut it out by hand. I’m making a few of these, so I’m happy to have my Brother SnC help!
So for my card base shape I used the circle shapes overlapped from my Mama Elephant Combo Circle Dies. You can use any other nested circles (or other shapes) to make your own!
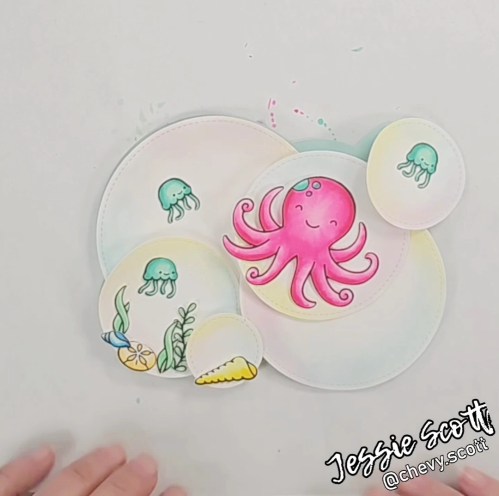
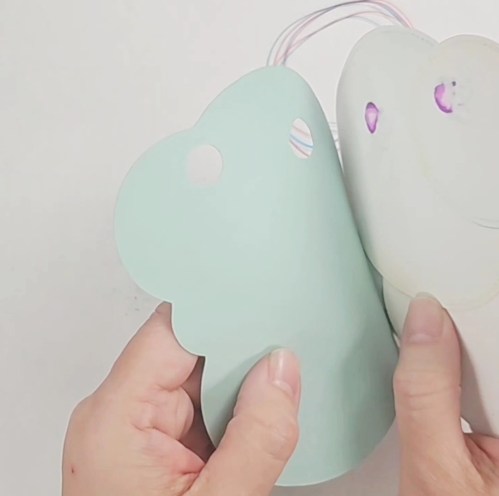
Once I have my card base and top shape piece (The overlapping circles that form the card fold cut off the top curves of the circles. This top piece keeps that full bubble look and will also give us something to assemble the bubbles on and hide the light between) now I’m ready to decorate my bubbles.
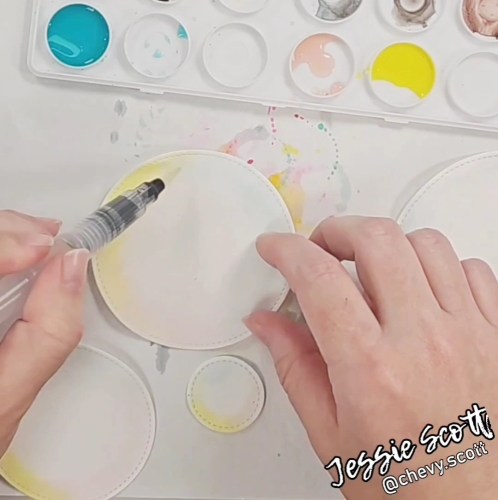
I used distress ink reinkers in squeezed lemonade, spun sugar, and salvaged patina to watercolor the edges of the circles in overlapping thirds blending the yellow, pink, blue together where they connect and fading the colors in to the center of the circles.
Since I also want to stamp and color on some of the circles, I just used my usual Neenah for alcohol markers and not watercolor paper. Even though I didn’t do heavy water coloring they did curl a little while drying. No worries! I sent them through my Minc (you can also send them through a laminator) to smooth them back flat.
I arrange all my images on the card so I can see where I want my jelly fish to be. I want them to be colored on the bubbles so the light will shine through best from the Pear Blossom Press Twinkle Lights.

I line up the bubbles with jelly fish up with the top piece and use a 1/2″ circle punch to have holes behind the jelly fish so the light will shine through directly behind them. I also note where the “push” button will need to be and stamp it on the shell using the Pear Blossom Press Stamp and Die Set.
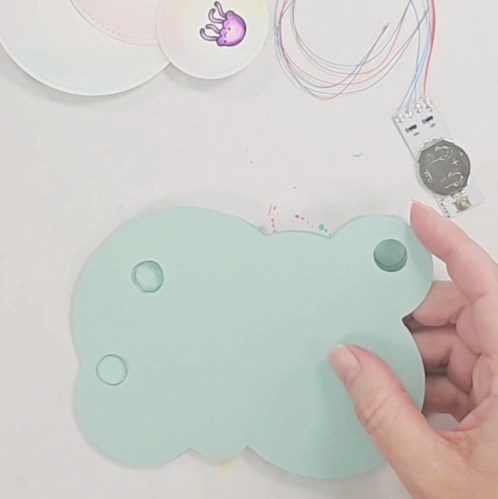
I trace where the holes are in the top piece onto the card base so I know where to place the lights. I also trace where the button will need to be.
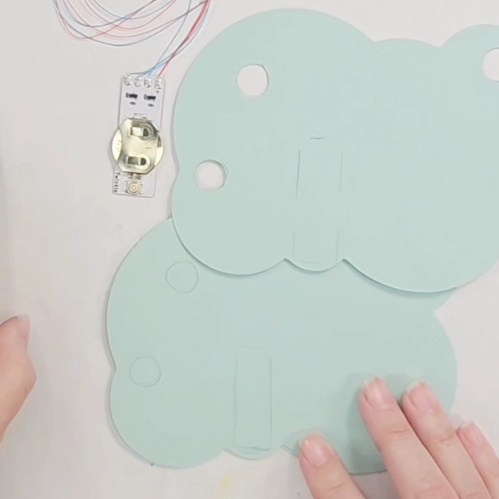
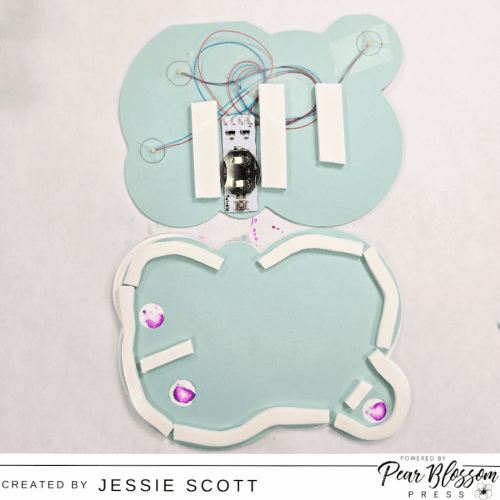
Now is the quick assembly with Pear Blossom Press World’s Greatest Foam Tape.
All of the rest of the colored images get added and then I added the sentiment using Lawn Fawn Happy Birthday Border die and Lawn Fawn Henry’s ABCs to spell “SUCKA”. Couldn’t resist a fun pun for an octopus! I accented the sentiments with white gel pen.

Supplies Used:
- Pear Blossom Press Twinkle Lights
- Pear Blossom Press World’s Greatest Foam Tape
- Pear Blossom Press Stamp and Die Set
- OLO Markers
- Mama Elephant Combo Circle Dies (or other nested circles in your stash)
- Lawn Fawn Mermaid for You stamp set (shell)
- Lawn Fawn Christmas Fishes stamp set (kelp)
- Lawn Fawn How You Bean Seashell Add-on stamp set (shell for button)
- Lawn Fawn Life is Good stamp set (sand dollar)
- Lawn Fawn Ocean Shell-fie stamp set (kelp, octopus, and jellies)
- Lawn Fawn Happy Birthday Border die
- Lawn Fawn Henry’s ABCs
- white gel pen
Here’s the full video of coloring and assembly!
Hope you enjoyed the card this month!
Be sure to check out the Pear Blossom Press Blog for more inspiration by myself and other Design Team members! If you are on Facebook, you can also follow Pear Blossom Press’s Page there for the latest news.

**Note: This blog does use affiliate links when possible.