Note: This post uses affiliate links at no additional cost to you! By clicking the links in this post, I earn a small commission should you make a purchase. Thank you in advance!
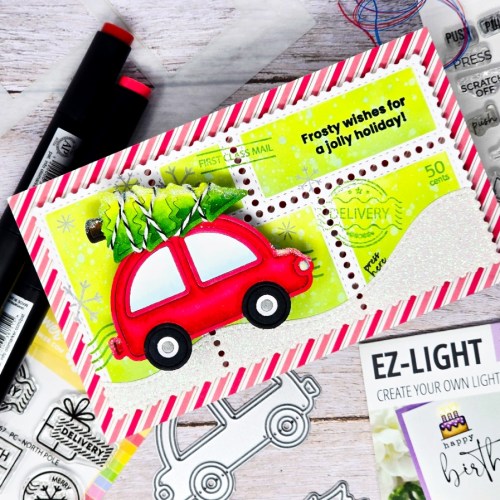
Greetings! Let’s have some fun with products from Pear Blossom Press today! I’ve combined it with the Lawn Fawn Deck the Car and the always fun Waffle Flower Mini Slimline Postage die and stencil set.
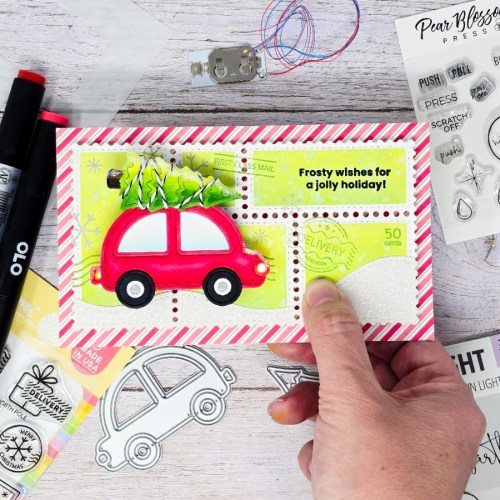
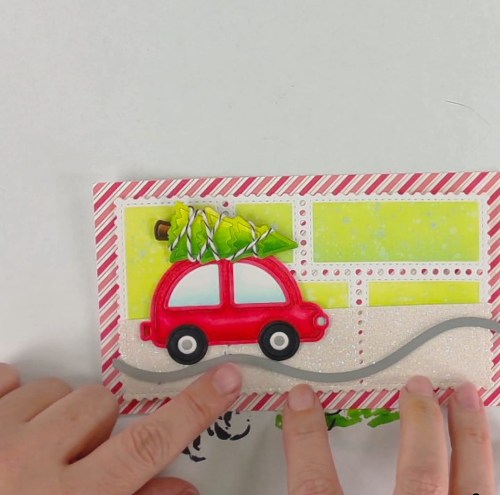
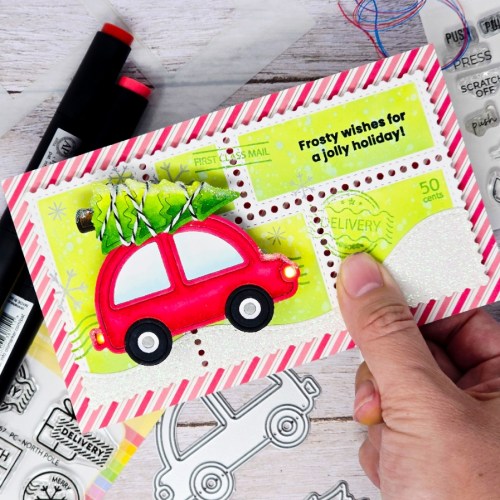
Here’s what we are making in action! This one is a DOUBLE interactive because I added a Pear Blossom Press Mini Action Wobbler.
Coloring and assembly video on youtube, link at the bottom of this page, or you can read my quick summary below!
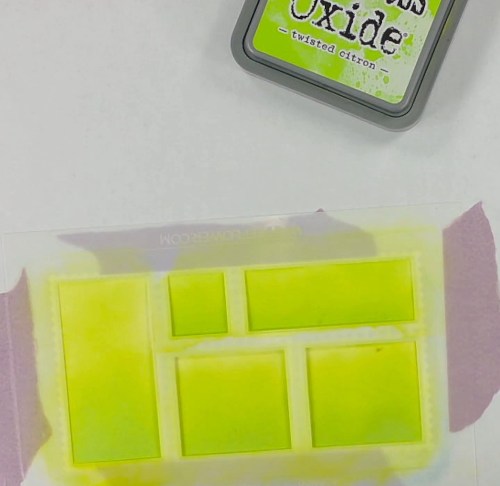
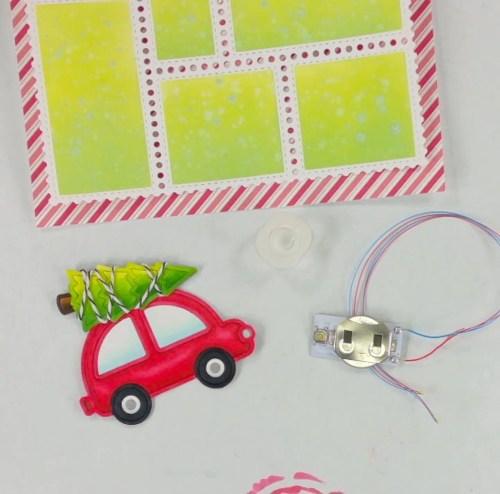
First I made the card base with Lawn Fawn Candy Cane Lane 6×6 Paper on a 3.5×6 card base. The Waffle Flower Mini Slimline Postage die and stencil set was on white and then I inked it up with Distress Ink Oxide Twisted Citron.
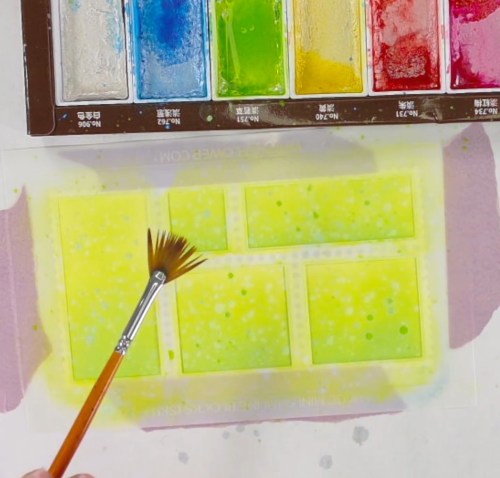
I splattered with water and then added Kuretake Gem watercolor splatter on top.
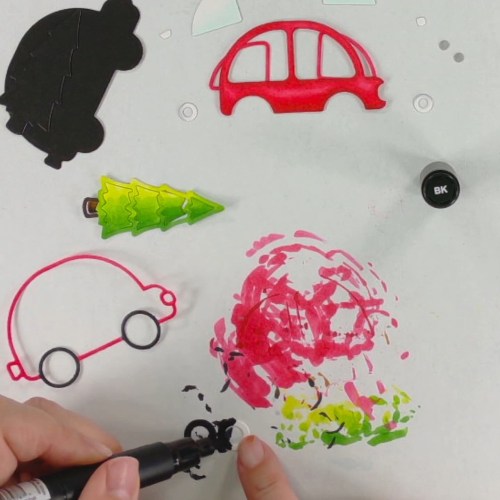
I colored the Lawn Fawn Deck the Car die cuts with my OLO Markers. I didn’t want a solid black outline so I colored the border pieces to match. To put the tree on the car, I wrapped the tree in some bakers twine so it looks like it is tied to the car. I added glitter on top of the tree, bumpers and the hood of the car for a fun snowy feel.
Pear Blossom Press EZ Lights come with 3 lights, but I only need 2 so I cut off one.
Then I cut out the bottom half of the background with white glitter paper and used the Lawn Fawn Stitched Hillside Borders to give a fun terrain for the car to drive on.
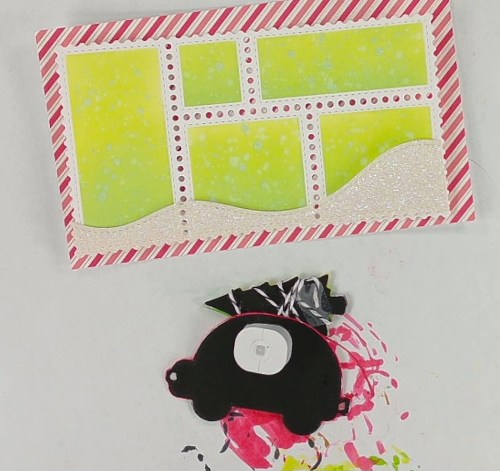
I balanced the car and tree on my finger to find the balance point and placed the Pear Blossom Press Mini Action Wobbler on that spot.
Before assembling, I decided to stamp some tone on tone stamp imagery on the background. I used Distressed Ink Oxide Mowed Lawn.
I marked where the wobbler would attach to the card front, then I cut a couple holes to fit the lights through from the back. This way the battery and button can stay behind the card front and only the lights are on the back of the car. I taped them behind the holes for the headlight and tail light. Then I applied it to the front by the wobbler.
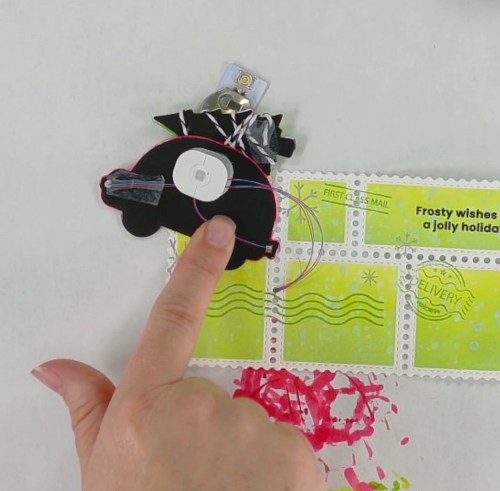
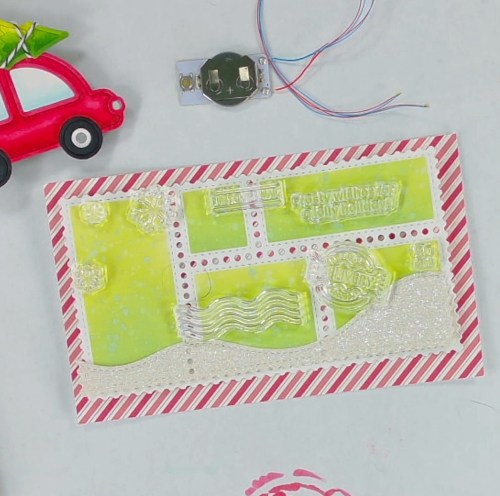
I pulled the extra wire through to the back and lined up the button with the slope and stamped “Press here” with the Pear Blossom Press Stamp and Die Set.
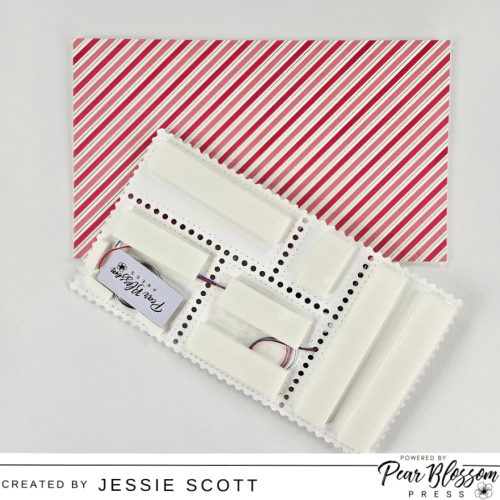
Before you flip over the top and mount to the card base, it looks like this with all the foam tape spaced out to not show through the holes.
Supplies Used:
- Pear Blossom Press EZ Lights
- Pear Blossom Press World’s Greatest Foam Tape
- Pear Blossom Press Stamp and Die Set
- Pear Blossom Press Vellum
- Pear Blossom Press Mini Action Wobbler
- Pear Blossom Press A2 T-square
- OLO Markers
- Lawn Fawn Deck the Car
- Lawn Fawn Stitched Hillside Borders
- Lawn Fawn Candy Cane Lane 6×6 Paper
- Waffle Flower Mini Slimline Postage die and stencil set
- Waffle Flower North Pole stamp set
- Kuretake Watercolor – Gem
- Distress Ink Oxide Twisted Citron
- Distressed Ink Oxide Mowed Lawn
Here’s the full video of coloring and assembly!
Hope you enjoyed the card this month!
Be sure to check out the Pear Blossom Press Blog for more inspiration by myself and other Design Team members! If you are on Facebook, you can also follow Pear Blossom Press’s Page there for the latest news.

**Note: This blog does use affiliate links when possible.

One thought on “Pear Blossom Press: Double Interactive Card”