Note: This post uses affiliate links at no additional cost to you! By clicking the links in this post, I earn a small commission should you make a purchase. Thank you in advance!
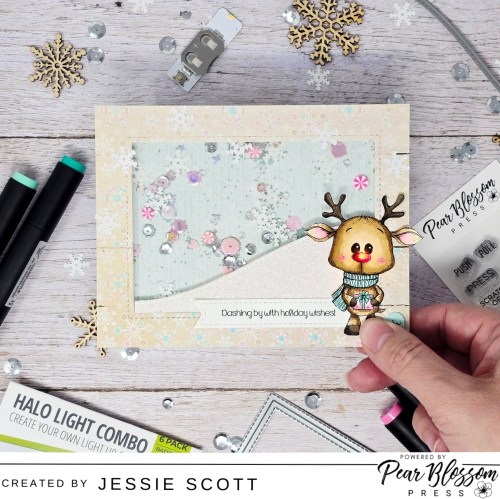
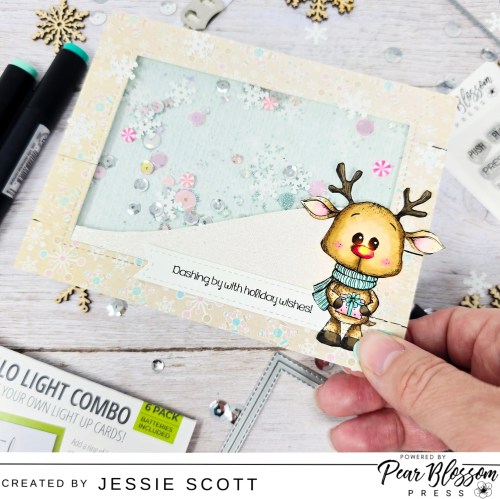
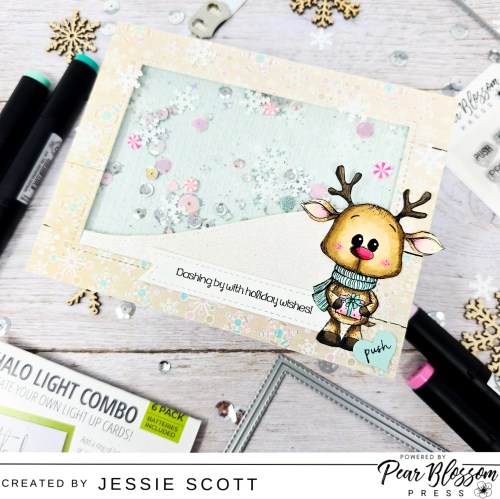
Greetings! Let’s have some fun with products from Pear Blossom Press today! I decided to use this super cute deer from Unity Stamp Company and give him a fun shaker background and ALSO light up his cute nose. I used the Pear Blossom Press Halo Light Combo Pack (One Light).
Here’s what we are making in action!
Coloring and assembly video on youtube, link at the bottom of this page, or you can read my quick summary below!
I started coloring my Unity Stamp Company – A Little Dash with some browns and then decided to pull some paper to match the scarf and present colors with.
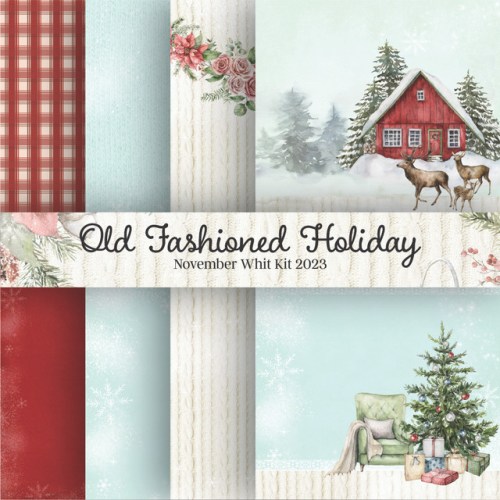
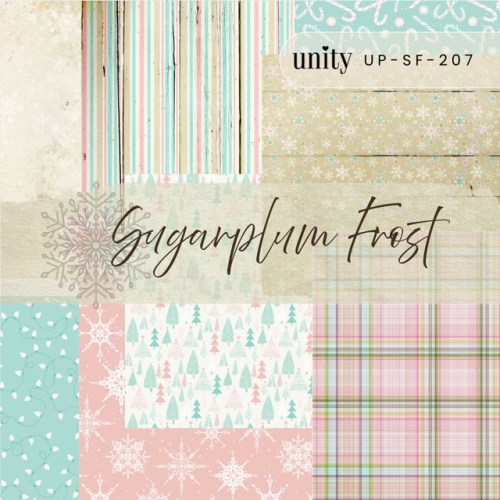
I chose the light blue scarf pattern from the Unity Stamp Company – Old Fashioned Holiday Paper Pack and the cute snowflake pattern from the Unity Stamp Company – Sugarplum Frost Paper Pack.
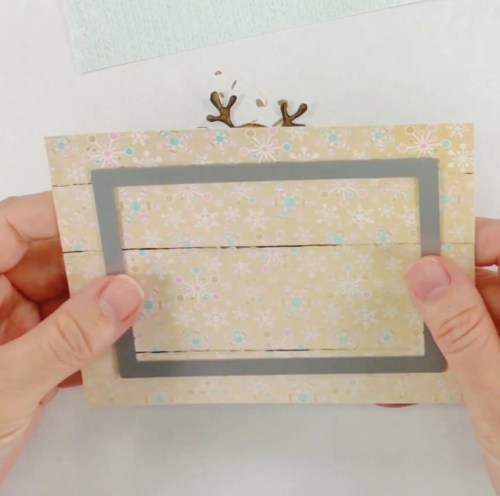
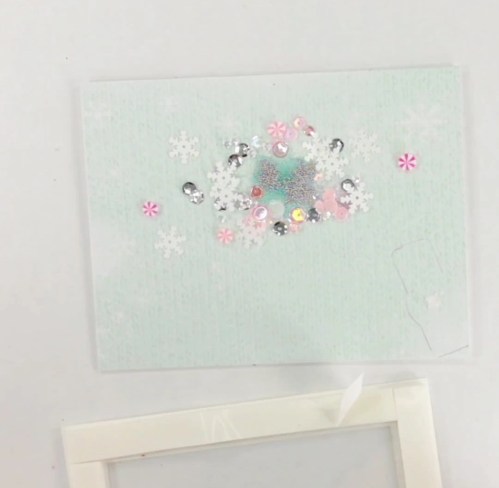
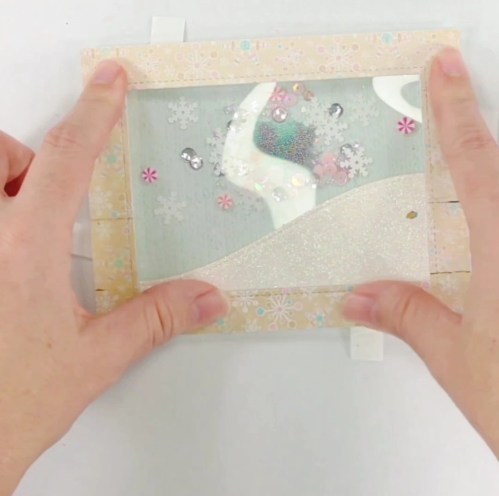
I used the second Lawn Fawn Outside in Stitched Rectangles to create a thick shaker window in the top panel of my card. I back this with a piece of acetate using double-sided tape.
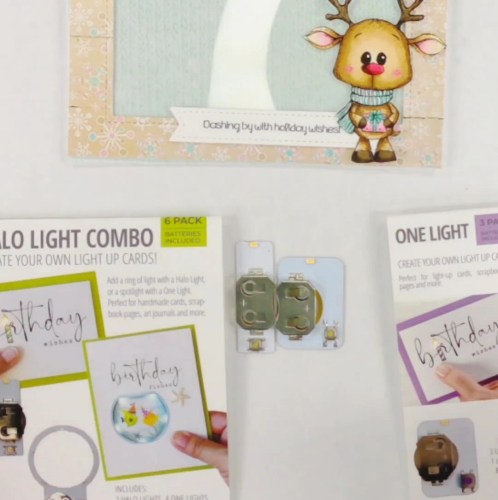
I compared the two different One Lights to see which one will let me hide the assembly behind the deer image and also have the button in just the right spot. I decide on the Pear Blossom Press Halo Light Combo Pack One Light and put away the Pear Blossom Press One Light.
I still had a little bit of the light showing through so a crafty friend suggested using a snow slope. I used the Lawn Fawn Stitched Hillside Borders and some iridescent paper to add a slope on the front of the acetate. DON’T ADHERE YET 🙂
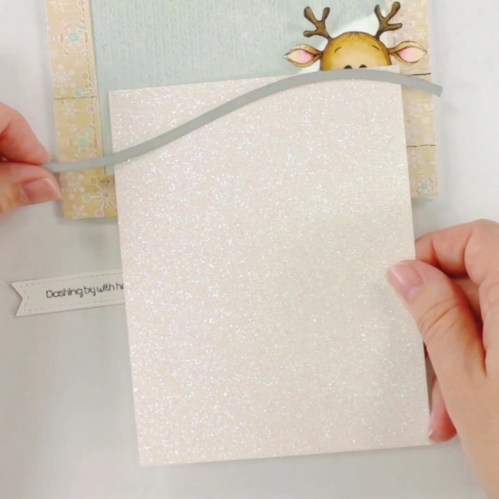
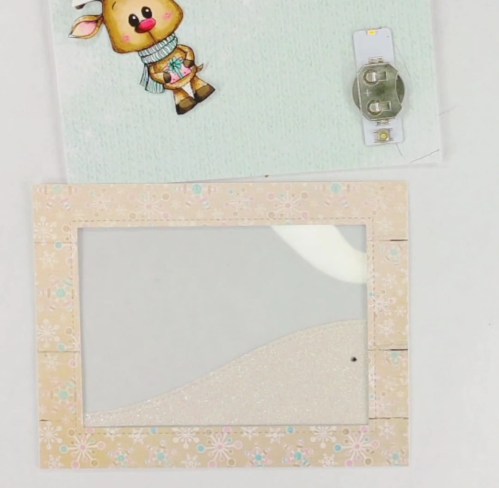
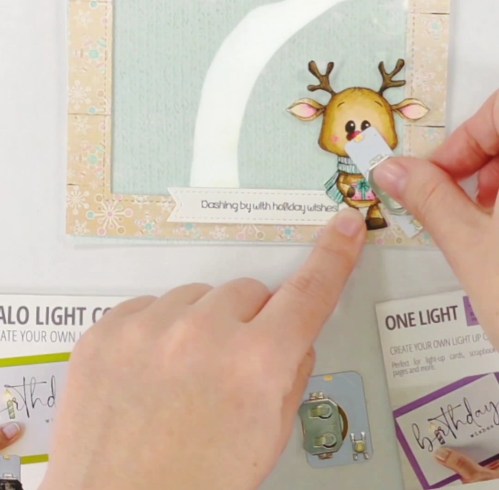
To make sure the light shines through to the nose, I set the shaker panel on top with the light placed and put a dot with a sharpe on the acetate. Then I lined up the snow slope and marked that spot on the glitter paper and make sure it lined up. I used a hole punch to make the hole and then I adhered the slope to the front of the acetate with double-sided tape.
Here’s a secret to great shaker cards. Always pick a few pieces to glue down randomly so when the shaker card is on display, it still has a couple shaker bits that haven’t fallen all to one side.
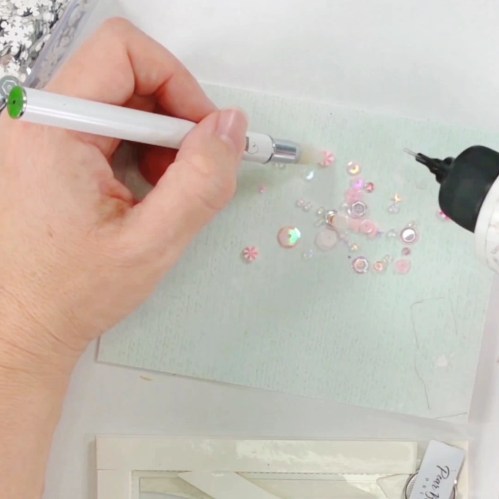
Another tip is to ensure you get a shaker sound. I make a little well with my shaker bits and pour some microbeads in it before I close up the shaker. Make sure you have a tight border and seal on your shaker so they don’t get out 😉
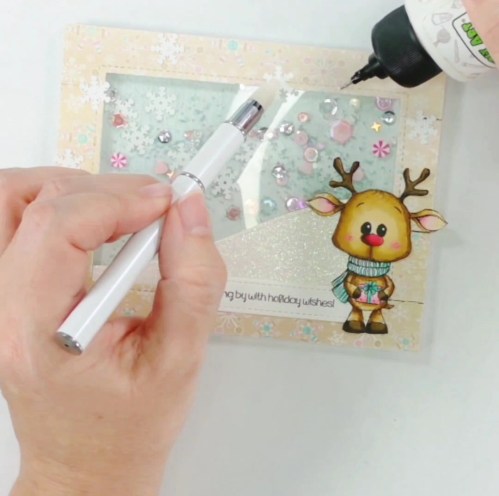
Now we are ready to close up this card! I used Pear Blossom Press World’s Greatest Foam Tape to outline the light and support the slope area and fame that open shaker.
I take off the interior foam tap liner, but leave on the large exterior pieces and only fold back the edges to stick out. This is a technique from Jennifer McGuire that makes it so you can line it up and tack down the corners before you commit. When ready, pull those tabs out to get the rest of the foam tape adhered and press it all down firmly before you try to give it a shake!
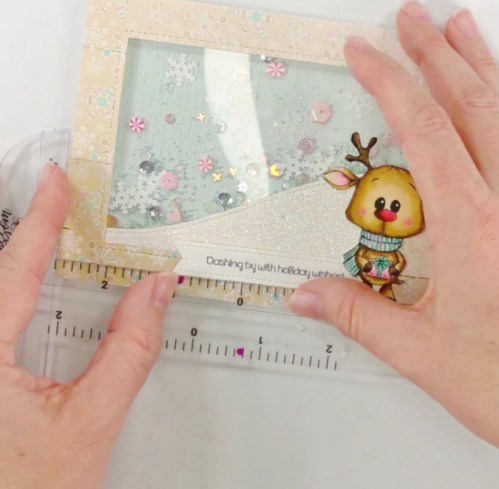
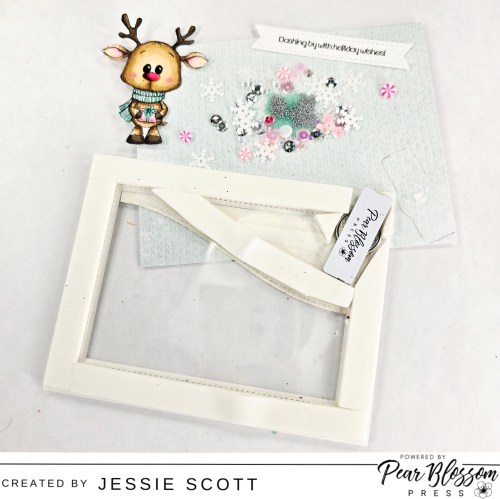
I used the Pear Blossom Press A2 T-square to line up the sentiment strip nice and straight. I trimmed off the right edge and stuck it behind the legs of the deer.
To add some more flare and match the shaker bits inside, I added some of the white snowflake shaker bits from the inside to the border on the outside.
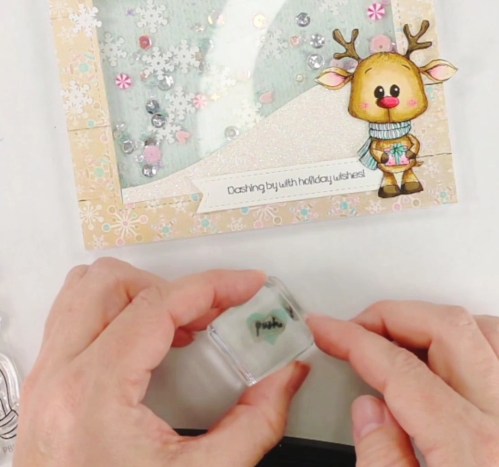
One last step! The button! I used a small heart punch to get a little teal matching heart to put over the button in the bottom right. I added the “push” from the Pear Blossom Press Stamp and Die Set.
Supplies Used:
- Pear Blossom Press Halo Light Combo Pack (One Light)
- Pear Blossom Press World’s Greatest Foam Tape
- Pear Blossom Press Stamp and Die Set
- Pear Blossom Press A2 T-square
- OLO Markers
- Unity Stamp Company – A Little Dash
- Unity Stamp Company – Old Fashioned Holiday Paper Pack
- Unity Stamp Company – Sugarplum Frost Paper Pack
- Lawn Fawn Stitched Hillside Borders
- Lawn Fawn Outside in Stitched Rectangles
- Acetate
- Iridescent glitter paper
- Shaker bits
Here’s the full video of coloring and assembly! (https://youtube.com/embed/Jpy80wFBN84)
Hope you enjoyed the card this month!
Be sure to check out the Pear Blossom Press Blog for more inspiration by myself and other Design Team members! If you are on Facebook, you can also follow Pear Blossom Press’s Page there for the latest news.

**Note: This blog does use affiliate links when possible.