Note: This post uses affiliate links at no additional cost to you! By clicking the links in this post, I earn a small commission should you make a purchase. Thank you in advance!
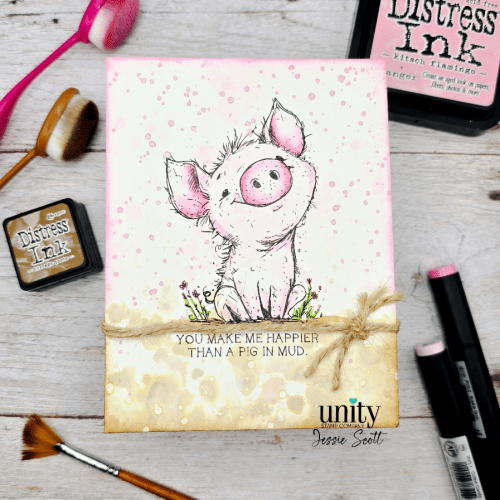
Greetings! Let’s have some fun with products from Unity Stamp Company today! Today’s card is from this month’s Uniquely Unity Subscription called Pig-cause.
Full video at bottom of the blog!
Supplies Used:
- Unity Stamp Company Uniquely Unity Subscription
- or Pig-cause 1 time purchase
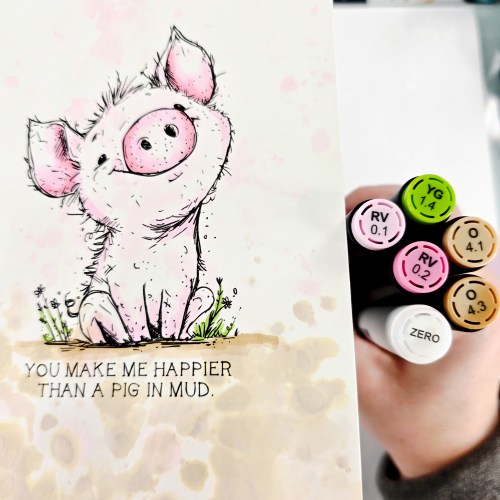
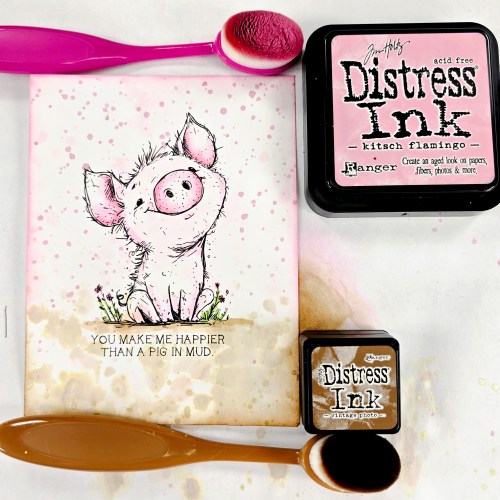
- OLO Markers RV0.2, RV0.1, Zero, YG1.4, O4.1, O4.3
- Distress Ink Vintage Photo and Kitsch Flamingo, ink blenders, and plastic packaging for smooshing
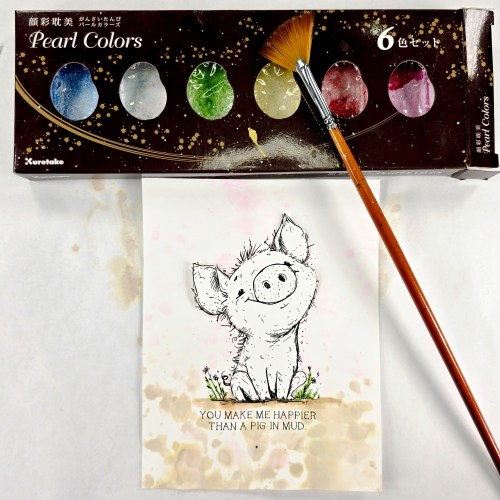
- Kuretake watercolor Pearls
- Jute twine, micro glue dots, and tape
Make it with me!
- Create an A2 (4.25″ x 5.5″) card base with white cardstock. Put aside.
- Create an A2 card front in smooth white watercolor paper.
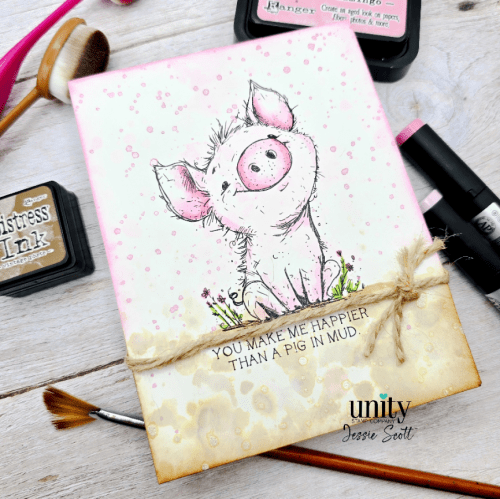
- Stamp piggie with sentiment below it with watercolor safe ink and then set it with heat. Sample uses Stellar Ink Black Widow.
- If not using watercolor paper, try to use less water, dry panel with heat gun, and flatten by running through a laminator in a carrier sheet before splattering.

Stamp Distress Ink Kitsch Flamingo on plastic packaging and spritz with water. Lift plastic and smoosh onto areas of and around the piggie. Repeat with Vintage Photo on the ground part.
Let dry, then add color to accent the nose and ears darker while the edges and bottom of the body are lighter, blending into the watercolor smoosh areas. Sample uses OLO Markers RV 0.2, RV 0.1 and Zero for piggie. YG 1.4 for stems/leaves, and O 4.3 and O4.1 for mud edges.
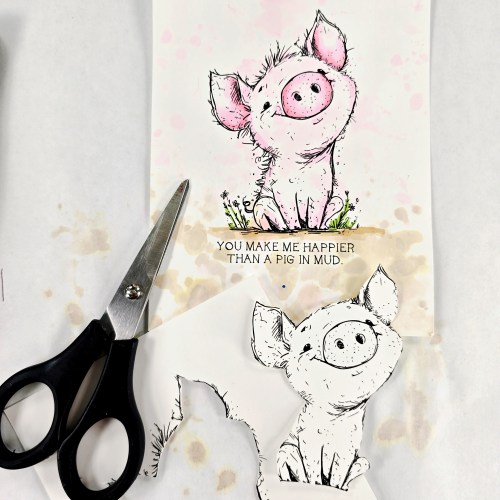
Cut a rough mask out of another piggie on scrap paper. Place on top of piggie for splattering.
Splatter top of cardfront with Kuretake Watercolor Pearls pink and then cover entire top with scrap paper and splatter bottom “mud” with the yellow.
Ink up the edges of the card front with the same distress colors to accent the edges.
Cut two pieces of jute twine 3” and two at 6”. Tape two 6” to the back of the panel, twist a few times over the front and wrap around front and tape on other side on back.
Use two micro glue dots to position the twisted jute in the line across the card you want it to stay in.
Wrap the two 3” jute pieces around the twisted pieces and tie in a knot to the right of the piggie.

Adhere the card front to the card base. Viola!
Here’s the full video of coloring and assembly!
Hope you enjoyed the card this week!

**Note: This blog does use affiliate links when possible.