Note: This post uses affiliate links at no additional cost to you! By clicking the links in this post, I earn a small commission should you make a purchase. Thank you in advance!
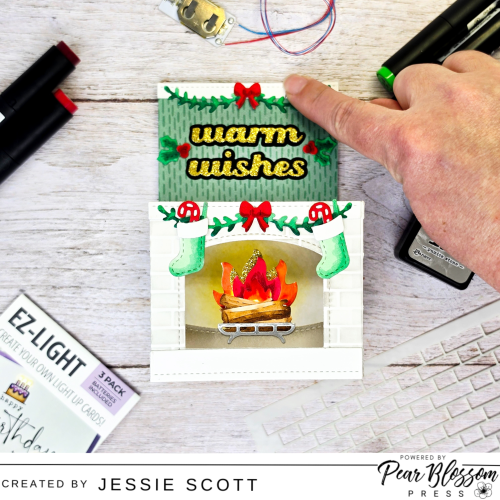
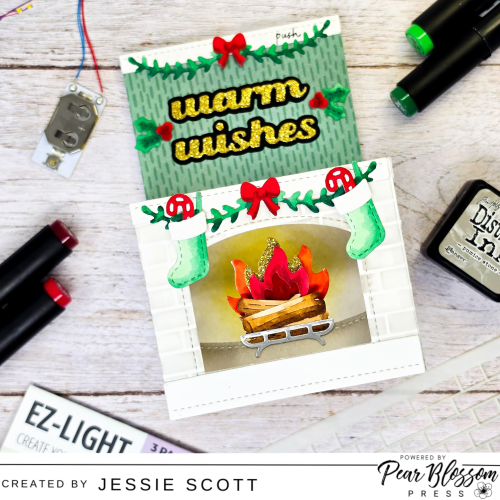
Greetings! Let’s have some fun with products from Pear Blossom Press today! I’m getting cracking on Christmas cards with this crackling fire place lit up with some warm wishes with the EZ Lights !
Here’s what we are making in action!
Coloring and assembly video on youtube, link at the bottom of this page, or you can read my quick summary below!
I’ve been wanting to make a card with this set for a while! Other options are to have Santa’s legs dangling from inside as well. Maybe next time with a Snap N’ Spin???
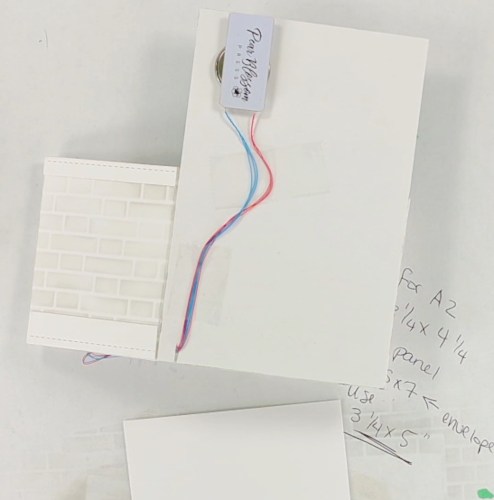
For this card I decided to make this shadow box card larger than the usual 2-3/4″ x 5-1/2″ folded flat. 4-1/4″ was a bit short and gave a ratio I didn’t prefer, so this one has an added 3-1/4″ x 5″ panel that makes the finished card 5″ x 5-1/2″. I will put it in a 5 x 7 envelope to mail.
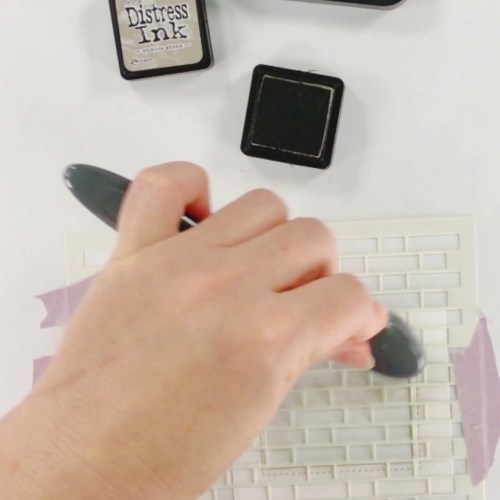
First cut out two shadow box pieces, cut one with the fireplace frame.
Ink up the panels with the Lawn Fawn Brick Stencil with Distress Ink Lost Shadow and Pumice Stone.
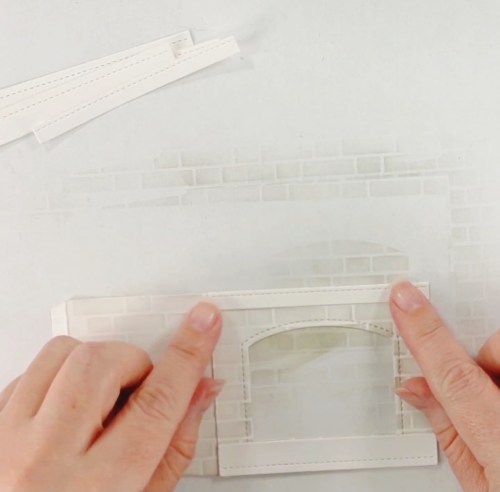
Glue the two pieces together on one side.
Add the top and bottom accent pieces for the fireplace on the front and two sides (trim extra off sides).
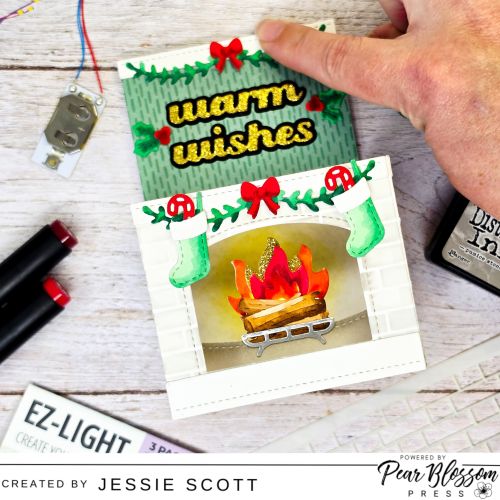
Do not close the shadow box until after we get the lights situated!
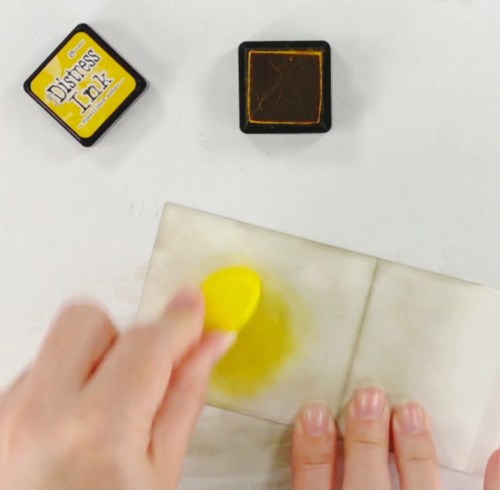
Ink up the inside of the panels with Lost Shadow and Pumice Stone to look like a sooty fireplace through the window. On the back inside, add Mustard Seed Distress Ink to mimic the glow of the fire we will have.
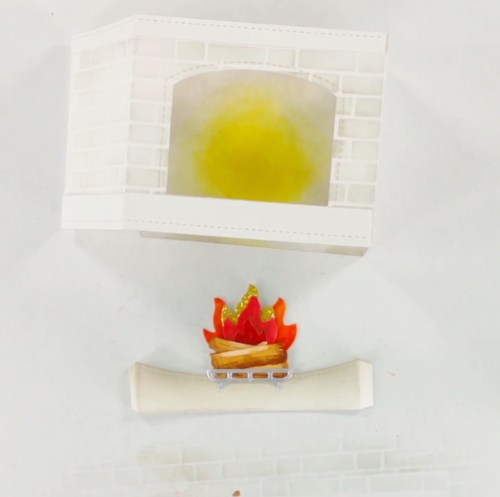
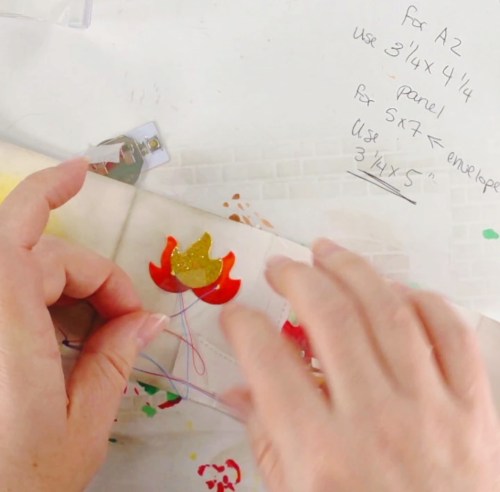
Ink up the fireplace insert piece to match the sooty look. Cut out a large flame with a small flame cut out of the center and color it red. Back this flame with Pear Blossom Press Vellum colored red with OLO Markers.
Assemble the fire into two pieces that will layer to match the image. The grill, logs, and the large flame with vellum get added to the insert piece, and the second assembly behind it of two more solid red flames connected with a center gold glitter flame. We will adhere these together using foam tape after we attach the lights.
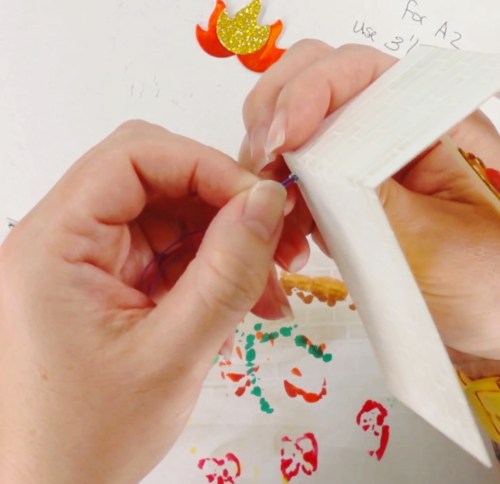
Use a small hole punch to make a hole in the back right bottom of the shadow box card for the lights to feed through. Tape a light to the back of the vellum flame so it peeks over the logs.
Glue the two other lights onto the glitter flame assembly onto the two red flames so that they will peek out to the left and right of the vellum flame that will be in front of it. Attach the flame assembly to the back of the log and flame with a thin foam tape below each of the lights on the red flames.
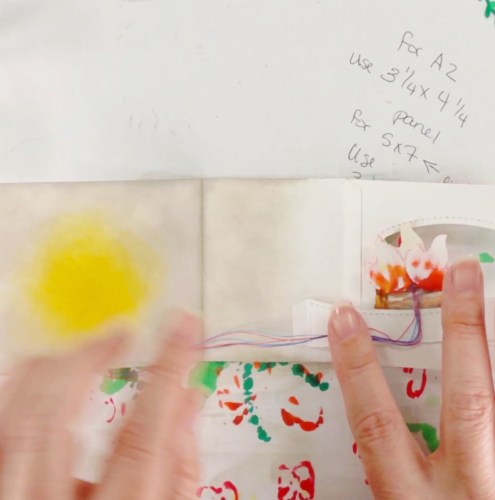
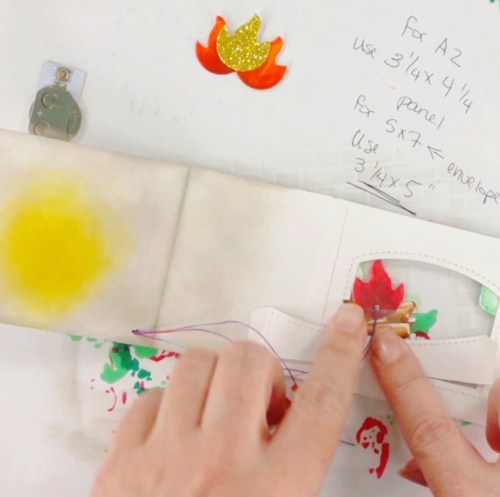
Tape the wires down onto the shadow box insert piece. Go ahead and attach the insert piece to the side of the shadow box like Lawn Fawn instructs. One side first. Make sure there is enough slack in the wires coming through the hole to let the shadow box flatten. Temporary tape the wires to the back of the shadow box to hold them in place. Go ahead and connect the insert to the other side and then close the box like Lawn Fawn instructs.
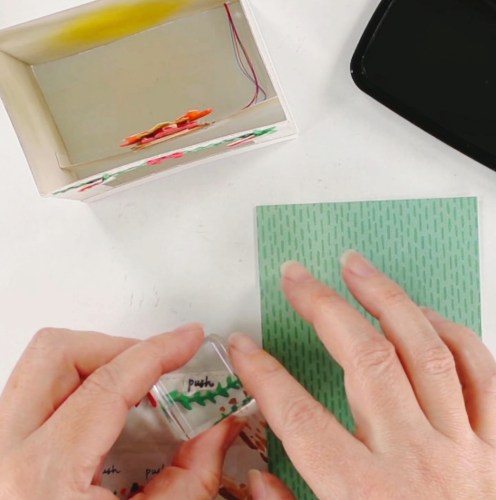
Cut out another thin white border to put on the top of a decorative paper piece cut at 5″ x 3-1/4″. Decorate with garland piece from the die set and stamp “push” from Pear Blossom Press Stamp and Die Set.
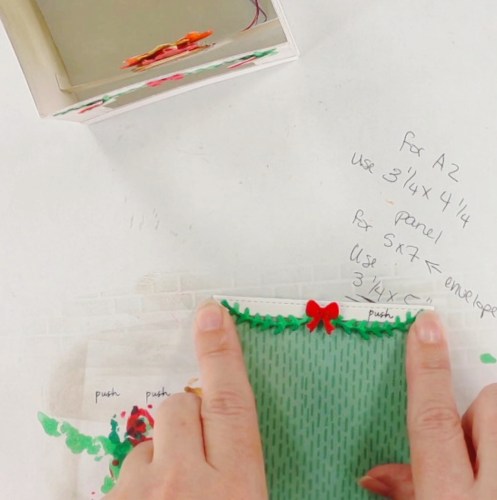
Finish decorating the front of the shadow box card with die cuts from the set colored with OLO Markers. Candy canes are tucked in stockings and added on another garland with bow. “Warm Wishes” is added above from Spellbinders Christmas Greetings Dies.
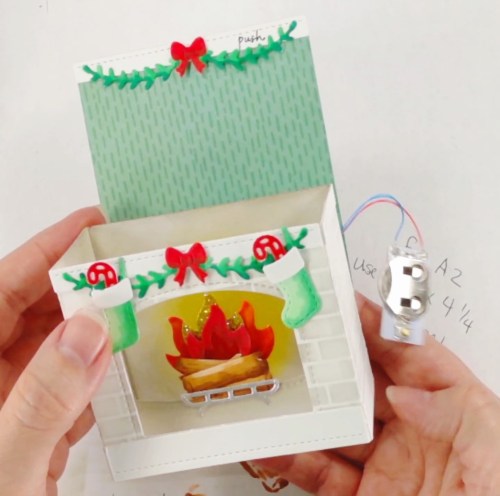

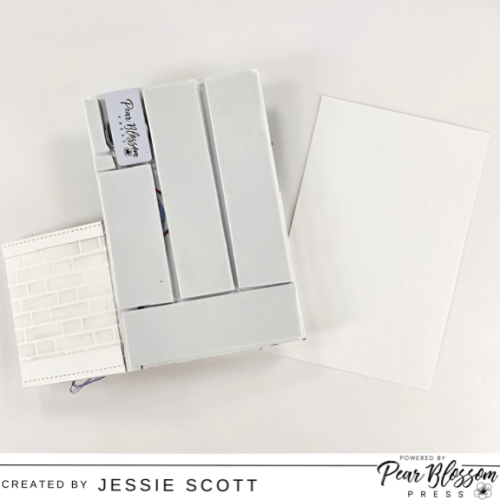
Before adhering the back piece, I cut a slit in the bottom right for the wires to slide through so the button can be pulled up the back and mounted to the top where the “press” is. Finish off the assembly with double thick foam tape and a 5″ x 3-1/4″ white panel to cover the button and have a place to write on.
Supplies Used:
- Pear Blossom Press EZ Lights
- Pear Blossom Press World’s Greatest Foam Tape or double thick foam tape
- Pear Blossom Press Stamp and Die Set
- Pear Blossom Press Vellum
- Pear Blossom Press A2 T-square
- OLO Markers
- Lawn Fawn Shadow Box Card
- Lawn Fawn Shadow Box Card Fireplace Add-On
- Lawn Fawn Brick Stencil
- Spellbinders Christmas Greetings Dies
- Distress Ink Mustard Seed, Pumice Stone and Lost Shadow
Here’s the full video of coloring and assembly!
Hope you enjoyed the card this month!
Be sure to check out the Pear Blossom Press Blog for more inspiration by myself and other Design Team members! If you are on Facebook, you can also follow Pear Blossom Press’s Page there for the latest news.

**Note: This blog does use affiliate links when possible.